
A few weeks ago on a long holiday, I played around with raylib. For those who don’t know, think of raylib as a simple batteries-included library to make games. It basically handles most things like: rendering, audio, window, user input, and much more. raylib is written in C with tons of bindings for other languages like Go, Rust, Python, etc.
I was interested on how simple raylib can be used to do stuff. It’s one of that library that just works.
However, it is not perfect. As of now (raylib 5.5), raylib currently does not provides an opiniated solution to handle a video file. Which is why you’d have to do it yourself, probably using things like ffmpeg, or gstreamer.
So, in this article, I will share how I handle video assets in Raylib with features like seeking, pausing/unpausing, changing playback rate, etc.
Currently i’m using the Rust bindings for raylib 5.5 and gstreamer. However, this method should still work for other languages.
This article is not a tutorial, but more like a summary of my experience. I will not go into too much detail about raylib or gstreamer, but I will provide some code snippets and explanations to help you understand the process.
If you need the full code snippet, you can find it on my GitHub
Also, by no means this is the best way to do it, as I’m currently still learning Rust. I just want to share my experience and hopefully it can help you in some way.
The main idea is pretty simple:
Here’s the dependencies that we need, put this in the cargo.toml file
1[dependencies]
2raylib = { version = "5.5" }
3gstreamer = "0.23.5"
4gstreamer-video = "0.23.5"
5gstreamer-app = "0.23.5"
6gstreamer-pbutils = "0.23.5"
7anyhow = "1.0.97" # optional
I added the anyhow crate just so that I don’t have to think much for the error handling, but it is not required.
The gstreamer-pbutils is optional, but it is useful to get the media metadata like video dimension, video codec, audio bitrate, etc. Which is what I did, but I’m not going to go into detail about that.
Our application starts with a simple command-line interface that accepts a video file path:
 1fn main() -> Result<()> {
 2    gst::init()?;
 3
 4    // Get the video file path from command line arguments
 5    let args: Vec<String> = env::args().collect();
 6    if args.len() != 2 {
 7        return Err(anyhow!("Usage: {} VIDEO_FILE_PATH", args[0]));
 8    }
 9    let path = &args[1];
10}
To specify the video file, we can do this
1cargo run -- video.mp4
Next, we set up our Raylib window
1// Initialize raylib
2let (mut rl, thread) = raylib::init()
3    .size(720, 360)
4    .resizable()
5    .title("GStreamer Video in Raylib")
6    .build();
This creates a window with a reasonable default size. I made it resizable just in case.
To make it easier to work with, I created a RaylibVideo struct that encapsulates the video playback functionality. This struct will hold all the necessary information about the video and its state.
 1struct RaylibVideo {
 2    pub duration: Duration,
 3    pub width: u32,
 4    pub height: u32,
 5    // Other metadata fields...
 6
 7    pub timestamp_ms: Arc<AtomicU64>,
 8    paused: bool,
 9    rate: f64,
10
11    pipeline: gst::Pipeline,
12    video_frame: Arc<Mutex<Vec<u8>>>,
13    video_frame_is_dirty: Arc<AtomicBool>,
14
15    pub frame_texture: Texture2D, // raylib::texture::Texture2D,
16}
17
18impl RaylibVideo {
19    fn new(
20        path: &str,
21        rl: &mut RaylibHandle,
22        thread: &RaylibThread,
23    ) -> anyhow::Result<RaylibVideo> {
24        // ...
25    }
26}
I store some video metadata like duration, width, height, and some other fields to hold states that we need at playback time.
You can also see that I have a frame_texture field that will hold the raylib texture. This texture will be drawn in the raylib window.
Also a side note, I used Arc<Mutex<T>> to wrap our frame data Vec<u8> because we are going to have 1 writer (gstreamer thread) and 1 reader (the raylib main loop).
After that, we can create the gstreamer pipeline like this:
 1        let pipeline_str = format!(
 2            "filesrc location=\"{}\" ! decodebin name=decode ! queue ! videoconvert ! video/x-raw,format=RGB,width={},height={},colorimetry=sRGB ! appsink name=appsink sync=true decode. ! queue ! audioconvert !volume volume=0.1 ! audioresample ! autoaudiosink",
 3            path_canonical_str, video_width, video_height
 4        );
 5
 6        let pipeline = gstreamer::parse::launch(&pipeline_str)
 7            .map_err(|e| anyhow!("Failed to create pipeline: {}", e))?;
 8        let pipeline = pipeline
 9            .downcast::<gst::Pipeline>()
10            .map_err(|_| anyhow!("Failed to downcast pipeline"))?;
11
12        // Get the appsink element
13        let appsink = pipeline
14            .by_name("appsink")
15            .ok_or_else(|| anyhow!("Failed to get appsink element"))?
16            .downcast::<gstreamer_app::AppSink>()
17            .map_err(|_| anyhow!("Failed to downcast appsink"))?;
You can think of the pipeline as a graph of elements that process the video. There are many elements that you can use, but in this case, I just need to decode the video and convert it to RGB format.
filesrc is the source element that reads the video file.decodebin is an element that automatically detects the video format and decodes it.videoconvert is an element that converts the video format to RGB.appsink is an element that allows us to retrieve the video frame buffer and send it to raylib.audioconvert is an element that converts the audio format to a compatible format.autoaudiosink is an element that automatically detects the audio output device and plays the audio.volume is an element that controls the audio volume.audioresample is an element that resamples the audio to a compatible format.colorimetry=sRGB is a property that specifies the color space of the video. In this case, we are using sRGB, which is a standard color space for most displays.sync=true is a property that synchronizes the video and audio playback. This means that the video and audio will start playing at the same time.width and height are properties that specify the width and height of the video. This is important because we need to create a raylib texture with the same dimensions as the video.So basically, just think of our pipeline as some sort of a black box that takes a video file and outputs a video frame.
After we create the pipeline, we can add a callback to the appsink element to retrieve the video frame buffer. This is where the magic happens. The appsink element will call our callback function every time a new video frame is available. In this callback, we will retrieve the video frame buffer and update our raylib texture.
 1        // Create a weak reference to the pipeline to avoid circular reference
 2        let weak_pipe = pipeline.downgrade();
 3
 4        // Create an Arc reference for our video states
 5        let ts_ref = Arc::new(AtomicU64::new(0));
 6        let ts_ref_clone = ts_ref.clone();
 7
 8        let frame_ref = Arc::new(Mutex::new(vec![
 9            0;
10            video_width as usize
11                * video_height as usize
12                * 3
13        ]));
14        let frame_ref_clone = frame_ref.clone();
15
16        let dirtiness_ref = Arc::new(AtomicBool::new(false));
17        let dirtiness_ref_clone = dirtiness_ref.clone();
18
19        appsink.set_callbacks(
20            gstreamer_app::AppSinkCallbacks::builder()
21                .new_sample(move |sink| {
22                    let sample = sink.pull_sample().map_err(|_| gst::FlowError::Eos)?;
23                    let buffer = sample.buffer().ok_or(gst::FlowError::Error)?;
24                    let map = buffer.map_readable().map_err(|_| gst::FlowError::Error)?;
25
26                    if let Some(pipeline) = weak_pipe.upgrade() {
27                        if let Some(v) = pipeline.query_position::<gst::ClockTime>() {
28                            ts_ref_clone.store(v.mseconds(), Ordering::Relaxed);
29                        }
30                    }
31
32                    // Lock the texture buffer for updating
33                    if let Ok(mut frame_data) = frame_ref_clone.lock() {
34                        frame_data.copy_from_slice(&map);
35                        dirtiness_ref_clone.store(true, Ordering::Relaxed);
36                    } else {
37                        eprintln!("Failed to lock texture buffer");
38                    }
39
40                    return Ok(gst::FlowSuccess::Ok);
41                })
42                .build(),
43        );
With this callback, everytime a new video frame is available, we will retrieve the video frame buffer and update our raylib texture.
Before we continue, since our RaylibVideo struct requires a Texture2D even if the video is not loaded yet, we need to create an empty texture. We can do this by creating a blank image and loading it into a texture.
 1use raylib::texture::{Image, RaylibTexture2D, Texture2D};
 2use raylib::{RaylibHandle, RaylibThread};
 3
 4fn init_empty_texture(
 5    width: u32,
 6    height: u32,
 7    rl: &mut RaylibHandle,
 8    t: &RaylibThread,
 9) -> Result<Texture2D> {
10    let img = Image::gen_image_color(
11        width as i32,
12        height as i32,
13        raylib::ffi::Color {
14            r: 0,
15            g: 0,
16            b: 0,
17            a: 0,
18        },
19    );
20
21    let mut texture = rl.load_texture_from_image(&t, &img)?;
22    texture.format = 4; // PIXELFORMAT_UNCOMPRESSED_R8G8B8
23    return Ok(texture);
24}
This function creates a blank image with the specified width and height, and then loads it into a texture. The texture format is set to PIXELFORMAT_UNCOMPRESSED_R8G8B8, which is the same format as the video frame buffer.
Now that we have our empty texture, we can periodically update the texture with the new video frame buffer. To do this, we can create another method in our RaylibVideo struct that will be called in the main loop of our raylib application.
 1impl RaylibVideo {
 2    // ... other methods
 3
 4    fn update(&mut self) {
 5        let latest_hash = self.video_frame_is_dirty.load(Ordering::Relaxed);
 6        if !latest_hash {
 7            return;
 8        }
 9
10        self.video_frame_is_dirty.store(false, Ordering::Relaxed);
11        if let Ok(frame_data) = self.video_frame.lock() {
12            let result = self.frame_texture.update_texture(&frame_data);
13            if let Err(err) = result {
14                println!("Failed to update video texture data: {}", err)
15            }
16        } else {
17            println!("Failed to obtain video frame lock")
18        }
19    }
20}
I’m using video_frame_is_dirty so that we only perform the update when the video frame buffer is dirty instead of doing it on every frame. The oldest trick from the books.
After that, we can finally create our RaylibVideo struct and return it:
 1let video = RaylibVideo {
 2    duration: Duration::new(0, 0),
 3    // other metadata fields...
 4
 5    timestamp_ms: ts_ref,
 6    paused: false,
 7    rate: 1.0,
 8    pipeline,
 9    video_frame: frame_ref,
10    video_frame_is_dirty: dirtiness_ref,
11    frame_texture: init_empty_texture(video_width, video_height, rl, thread)?,
12};
13
14return Ok(video);
Now that we have our RaylibVideo struct, we can control the playback of the video. We can pause, unpause, seek, and change the playback rate.
It is quite straightforward to do pause/unpause. We just need to set the paused field to true or false, and then call the set_state method on the pipeline:
 1    fn play(&mut self) {
 2        self.paused = false;
 3        if let Err(err) = self.pipeline.set_state(gst::State::Playing) {
 4            println!("Error while changing pipeline state to Playing: {}", err)
 5        }
 6    }
 7
 8    fn pause(&mut self) {
 9        self.paused = true;
10        if let Err(err) = self.pipeline.set_state(gst::State::Paused) {
11            println!("Error while changing pipeline state to Paused: {}", err)
12        }
13    }
For the seek functionality, we can use the seek method on the pipeline.
 1    fn seek(&self, time_ms: i64) {
 2        let t = time_ms.clamp(0, self.duration.as_millis() as i64) as u64;
 3        let target_ts = gst::ClockTime::from_mseconds(t);
 4        self.timestamp_ms.store(t, Ordering::Relaxed);
 5
 6        if let Err(err) = self.pipeline.seek(
 7            self.rate,
 8            SeekFlags::FLUSH | SeekFlags::KEY_UNIT | SeekFlags::TRICKMODE,
 9            gstreamer::SeekType::Set,
10            target_ts,
11            gstreamer::SeekType::End,
12            ClockTime::ZERO,
13        ) {
14            println!("Failed to set video rate: {}", err)
15        }
16        return;
17    }
You can see that I used the following flags (quoted from the gstreamer documentation):
FLUSH: Flush the pipeline before seeking.KEY_UNIT: Seek to the nearest keyframe. This might be faster but less accurate.TRICKMODE: When doing fast forward or fast reverse playback, allow elements to skip frames instead of generating all frames.More on the SeekFlags can be found in the gstreamer documentation.
Apparently, the seek method also takes rate as a parameter. This is the playback rate, which is a multiplier for the normal playback speed. Which means that we can also use this to change the playback speed.
 1    fn set_rate(&mut self, rate: f64) {
 2        self.rate = rate.max(0.01);
 3        let curr = self.get_timestamp();
 4        if let Err(err) = self.pipeline.seek(
 5            self.rate,
 6            SeekFlags::FLUSH | SeekFlags::KEY_UNIT | SeekFlags::TRICKMODE,
 7            gstreamer::SeekType::Set,
 8            gst::ClockTime::from_mseconds(curr),
 9            gstreamer::SeekType::End,
10            ClockTime::ZERO,
11        ) {
12            println!("Failed to set video rate: {}", err)
13        }
14    }
15
16    fn get_rate(&self) -> f64 {
17        return self.rate;
18    }
I made the rate to be at least 0.01 so that we don’t end up with a 0 or negative rate. I mean, you could set it to negative and make the video play backward, but that’s not what I want to do. But feel free to experiment yourself.
Also, for some reason, setting the rate to 0 will make it implodes and yells some assertion failure.
1(rust-raylib-gstreamer:41885): GStreamer-CRITICAL **: 13:00:36.876: gst_event_new_seek: assertion 'rate != 0.0' failed
2(rust-raylib-gstreamer:41885): GStreamer-CRITICAL **: 13:00:36.876: gst_element_send_event: assertion 'event != NULL' failed
Let me know why the fuck is rate == 0.0 not allowed.
Now for the final part of our RaylibStruct shenanegans, we need to clean up the pipeline after we finished using it. To do that, we can simply set the state to Null when we drop it.
1impl Drop for RaylibVideo {
2    fn drop(&mut self) {
3        let _ = self.pipeline.set_state(gst::State::Null);
4    }
5}
If you’re catching up with me this far, (i know u didn’t).
Congrats! Now we can use it in the actual raylib loop.
This is more or less how we can use our RaylibVideo instance. Pretty simple if you asked me. Feel free to play around with it
 1fn main() -> Result<()> {
 2    gst::init()?;
 3
 4    // Get the video file path from command line arguments
 5    let args: Vec<String> = env::args().collect();
 6    if args.len() != 2 {
 7        return Err(anyhow!("Usage: {} VIDEO_FILE_PATH", args[0]));
 8    }
 9    let path = &args[1];
10
11    // Initialize raylib
12    let (mut rl, thread) = raylib::init()
13        .size(720, 360)
14        .resizable()
15        .title("GStreamer Video in Raylib")
16        .build();
17
18    // Init video and play
19    let mut v = RaylibVideo::new(path, &mut rl, &thread)?;
20    v.play();
21
22    let scale = 1.0;
23    let rotation = 0.0;
24    let pos = Vector2::new(0.0, 0.0);
25
26    while !rl.window_should_close() {
27        let mut d = rl.begin_drawing(&thread);
28
29        // Clear the screen
30        d.clear_background(Color::BLACK);
31
32        // Update the video frame
33        v.update();
34
35        // Draw the video frame
36        d.draw_texture_ex(&v.frame_texture, pos, rotation, scale, Color::WHITE);
37
38        d.draw_fps(0, 0);
39    }
40
41    return Ok(());
42}
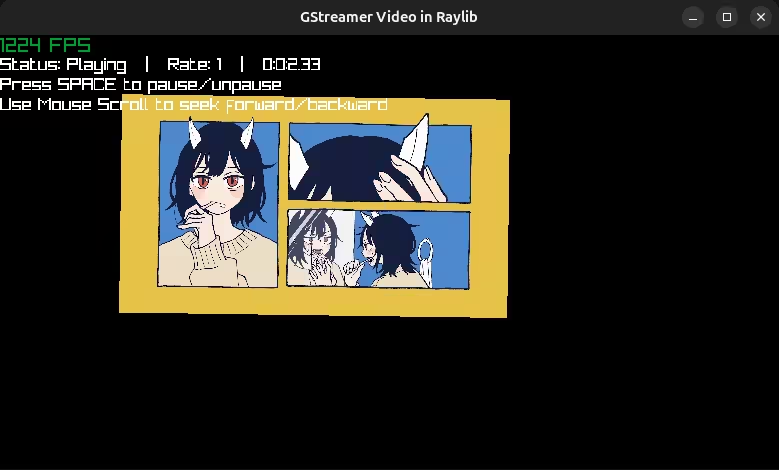
Now that we are finally done, we can finally play some banger in raylib.
cargo run -- mirror_tune.mp4
Like I said, this is not a tutorial, but more like a summary of my experience. I hope you find it useful and informative. For the full code, you can find it on my GitHub
Thanks for reading!